The gemological Microscope is one of the necessary jewelry testing instruments in the laboratory. It has a wide range of uses. The most important thing is to observe the inclusions and surface characteristics of gems through magnification. It is an important means to distinguish natural gems, synthetic gems and imitation gems.
1. Principle application of gem microscope
In jewelry appraisal, more than three pieces of valid evidence are usually needed to carefully determine the final name of the gemstone to be tested. Such as rubies or rubies (filled) or synthetic rubies.
- (1) Check the surface characteristics of gemstones
Surface scratches, erosion, damage, split surfaces, etc. on gemstones.
- (2) Internal characteristics of gemstones
Including the type, shape, quantity, twin crystal faces, growth lines, bubbles, triangular growth marks, growth ribbons, color and shape distribution characteristics of inclusions, etc., it has identification significance for gems containing special inclusions.
- (3) Observe the double image of the facets after observing the gemstone.
2. Structure
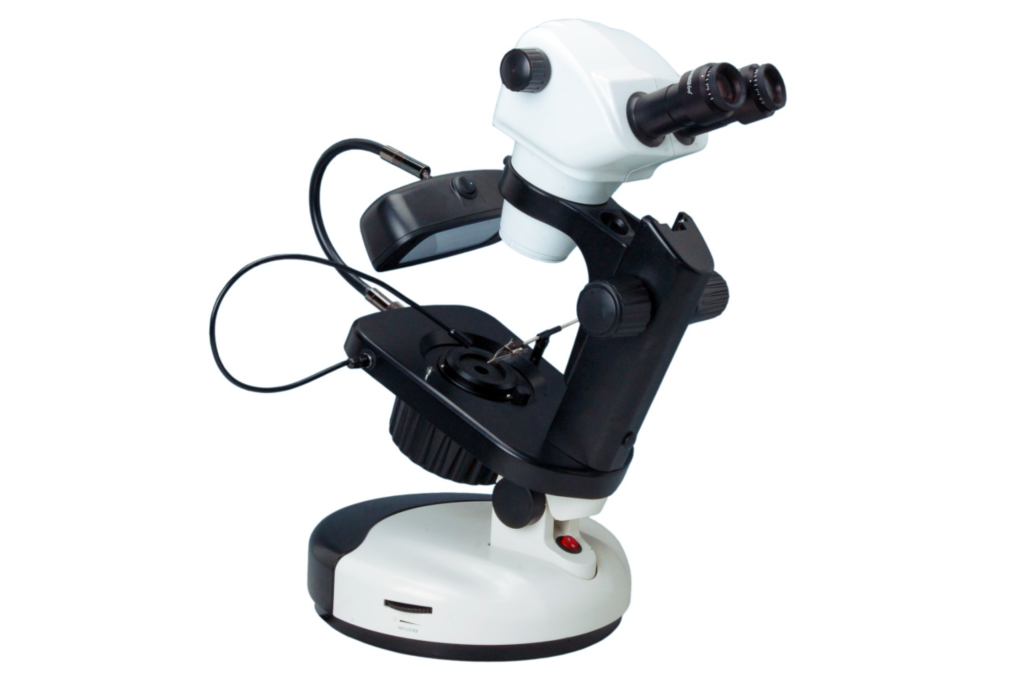
Types of gem microscopes include single-tube microscopes, binocular microscopes, binocular stereo microscopes, binocular stereo zoom microscopes, etc. At present, vertical binocular stereo continuous zoom microscopes are mostly used (Figure 1), and their magnifications can range from 10 times to 70 times. Change between times and can zoom continuously. It consists of four parts: binocular eyepiece, variable magnification objective lens, microscope stand and light source system.

- (1) Eyepiece (Figure 2): Installed on the upper end of the lens tube, it is a binocular with two magnifications: 10× and 20×.
- (2) Objective lens: Installed at the lower end of the lens barrel, the magnification is 0~4×, adjustable.
- (3) Zoom knob (Figure 3): Continuously adjust the magnification of the objective lens.


- (4) Adjustment knob (Figure 4): It consists of a rack and a knob. It can raise and lower the lens body, adjust the working distance between the objective lens and the gemstone to be measured, and bring the measured part into clear focus.
- (5) Top light source (Figure 5): A light source that illuminates the surface vertically, usually a fluorescent lamp, with adjustable direction.

- (6) Bottom light source (Figure 6): Bottom-illuminated transmitted light source, usually an incandescent lamp, built-in, the direction is not adjustable, and the light intensity can be adjusted through the slide key.

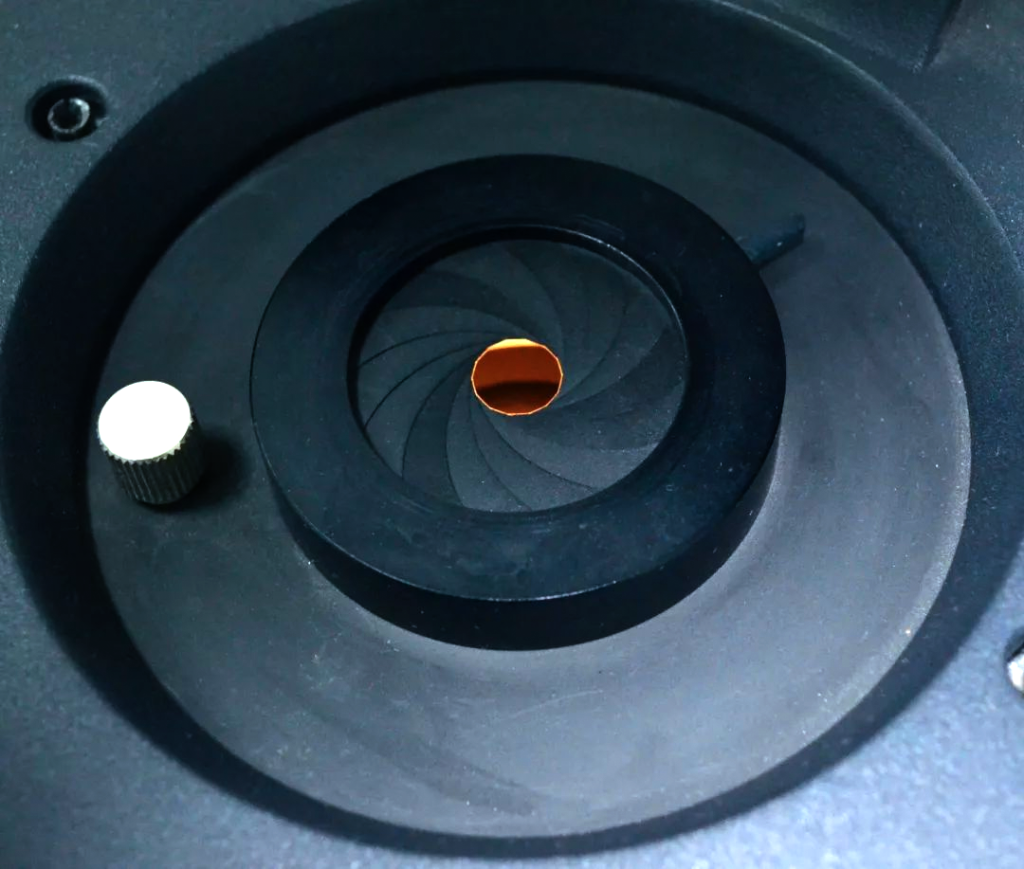
- (7) Lock the aperture (Figure 7): Control the amount of light illuminated by the bottom light source.
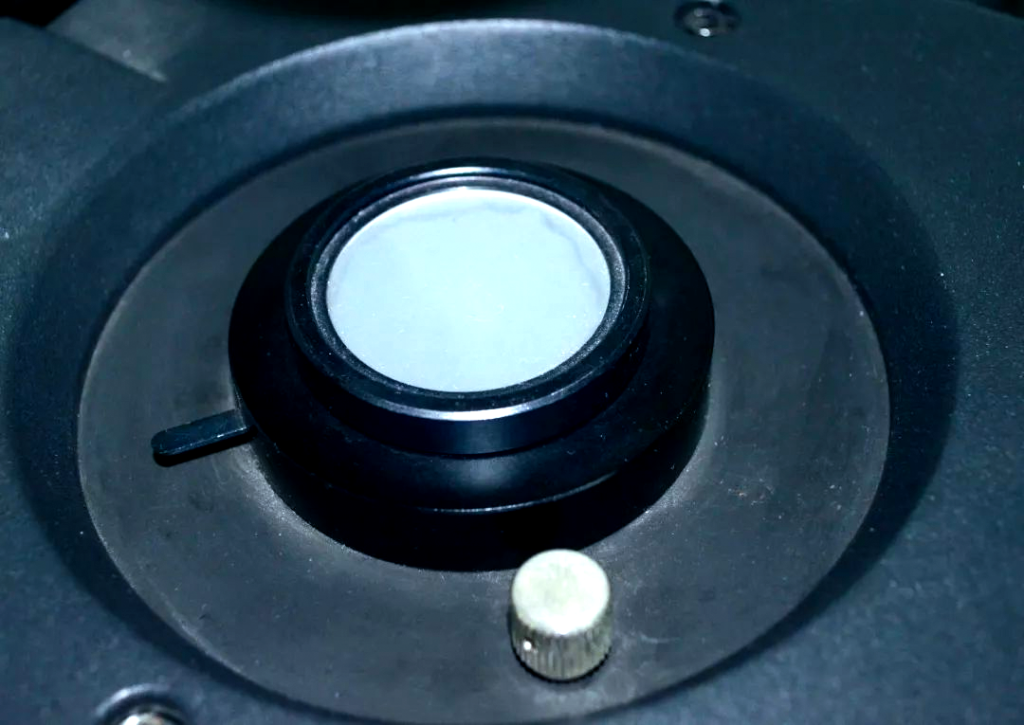
- (8) Baffle (Figure 8): Change the lighting mode of the bottom light source (bright area/dark area).
- (9) Gem tweezers: used to hold gems. They can move up and down, left and right, forward and backward, and rotate themselves.
3. Lighting method
Due to the different transparency of gemstones and the different types of inclusions, choosing the appropriate lighting method will achieve better observation results.
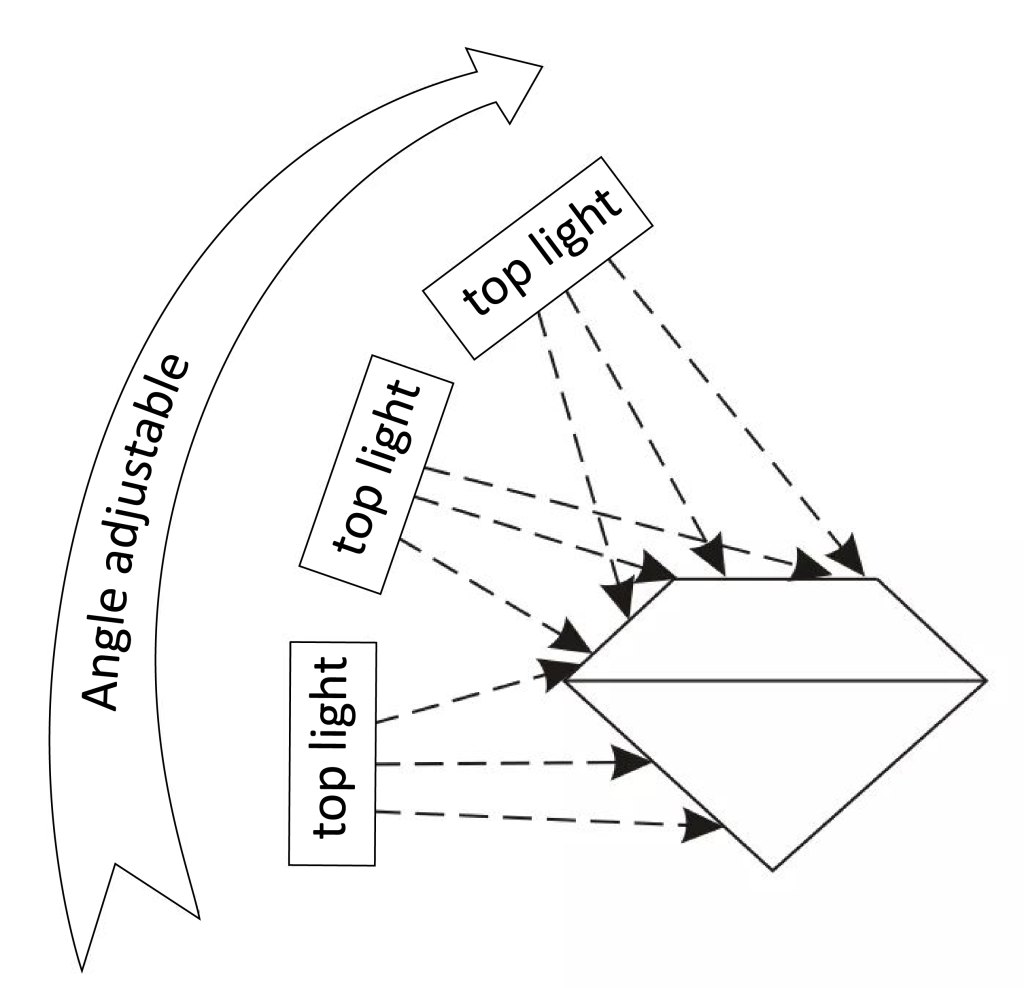
A. Vertical lighting method (top light lighting method) (Figure 9):
Turn off the bottom light source and illuminate the gem vertically (or nearly vertically) with the top light source. It is mainly used to observe the surface characteristics of gemstones. Sometimes, for transparent and light-colored gemstones, the internal characteristics under vertical illumination of natural light can also be observed.
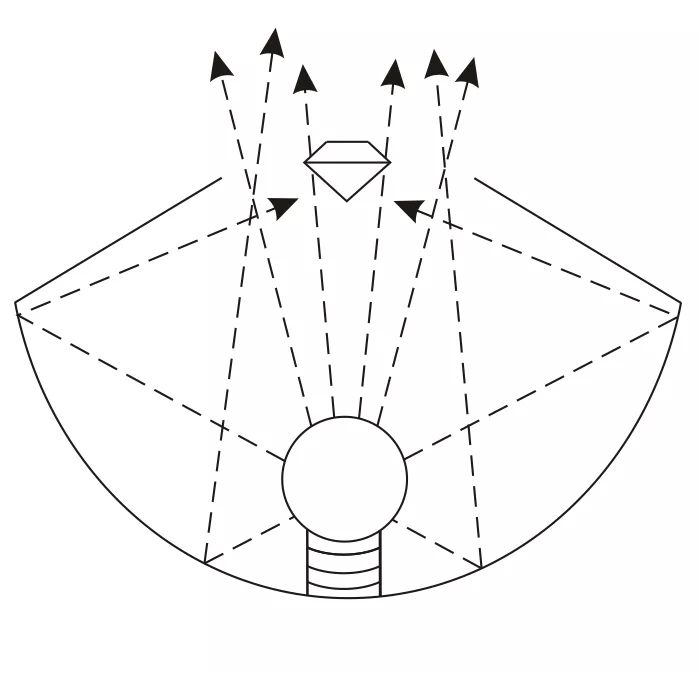
B. Bright field lighting method (Figure 10):
Remove the light barrier so that the light from the bottom light source can be viewed directly through the gemstone. It is mainly used to observe the inclusions of gemstones, especially for the observation of color bands, growth lines, and low-protrusion inclusions.
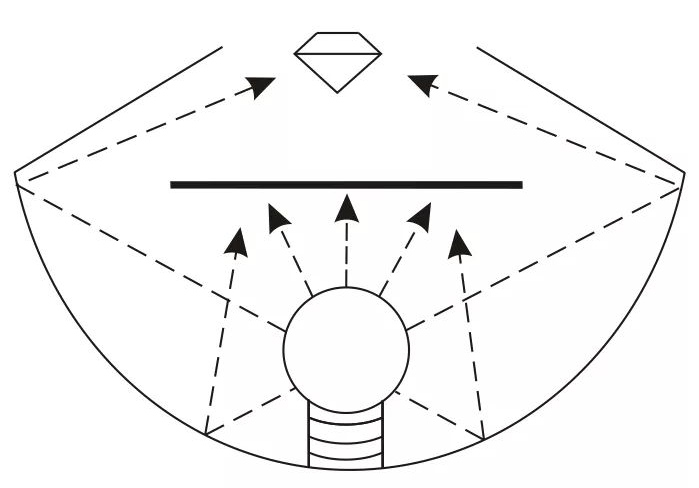
C. Dark field lighting method (Figure 11):
Turn on the bottom light source and add a baffle to obtain metered illumination, making the inclusions appear more clearly against a dark background. It is mainly used to observe the internal characteristics of gemstones, so that the internal characteristics can present a clear image on a dark background, and the specific shape and characteristics of the internal characteristics, such as phase, color, etc., can be observed.
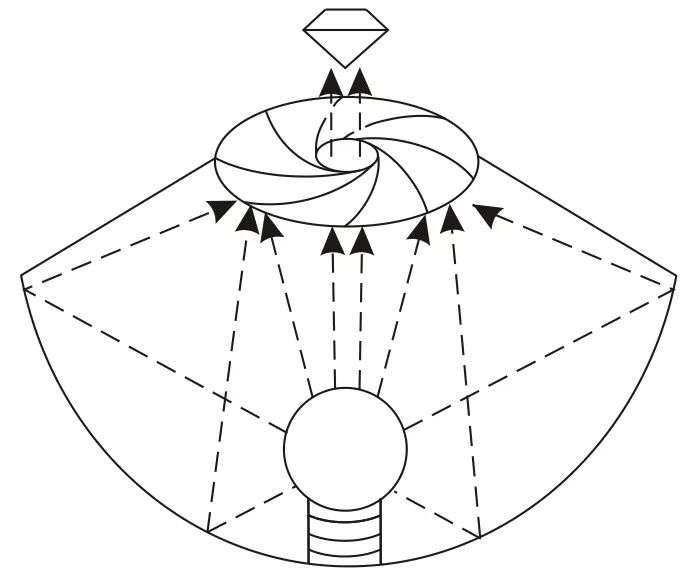
D. Point light illumination method (Figure 12):
Use a bottom light source and narrow the aperture to illuminate the gemstone in a point-like manner. It is mainly used to observe local features and some special structures inside gemstones.
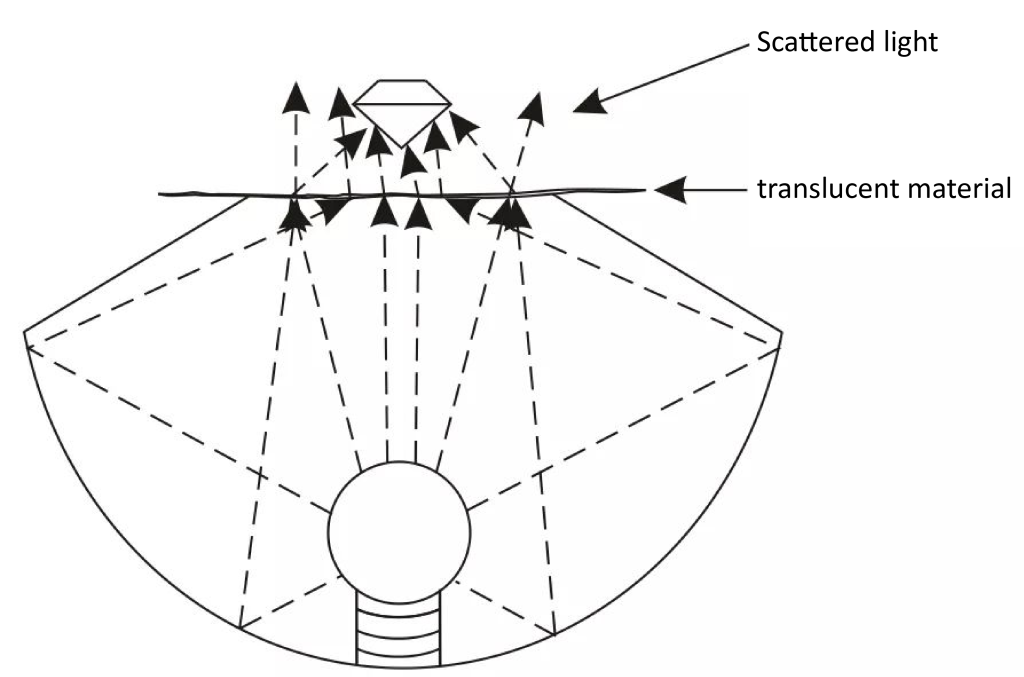
E. Scattered illumination method (Figure 13):
Place a translucent material such as a tissue between the gemstone and the light source to diffuse and soften the light. It is mainly used to assist in observing the color bands, color rings and some special color distributions of gemstones.
In addition to the above five commonly used lighting methods, oblique lighting, polarized lighting, horizontal lighting, masked lighting, compound lighting, etc. can also be used.
4. Operation method:
1. Clean the eyepiece and the gem to be tested, and clamp the gem on the gem tweezers;
2. Plug in the power, turn on the bottom light source, select dark area lighting, and adjust the distance (method: hold an eyepiece with both hands and move it until both eyes clearly see a complete circular field of view (Figure 14)).

3. Adjust the focal length to make the gem clearly imaged. First focus on the surface of the gem, use the top light source illumination method to observe the external features, switch to the dark area or bright area illumination method, and then focus on the inside of the gem to observe the internal features.
4. Adjust the zoom knob, start observing from the low-magnification objective lens, and when you find the target observation object, perform local high-magnification observation.
5. After the observation is completed, remove the gemstone and put it away, lower or raise the lens barrel to level the microscope, and turn off the power.
5. Things to note:
- (1) The gem microscope is a precision optical instrument. It should be operated gently and not with excessive force.
- (2) Do not touch the lens with your hands. If you need to clean the lens, use a lens cleaning cloth.
- (3) Use both hands when adjusting the zoom knob.
- (4) Turn off the power switch when not in use.
- (5) After observation, adjust the objective lens to the lowest point to avoid quasi-focus spiral fatigue and extend service life.
6. Purpose:
The main purpose of a gem microscope is to observe the internal and external features of gems under magnification and to test the approximate refractive index of gems. When some components are added, its functions can be expanded.
A. Check the external characteristics of the gemstone
- (1) Observe the basic properties of gemstones
Observe the surface gloss, sharpness of the ridges, surface smoothness, original crystal planes and cleavage of the gemstone to get some identification information. If there is a split seam on the waist of the gemstone, it may be a split stone; if the gemstone has sharp ridges and a smooth surface, it means that the gemstone is very hard (Figure 15, Figure 16).

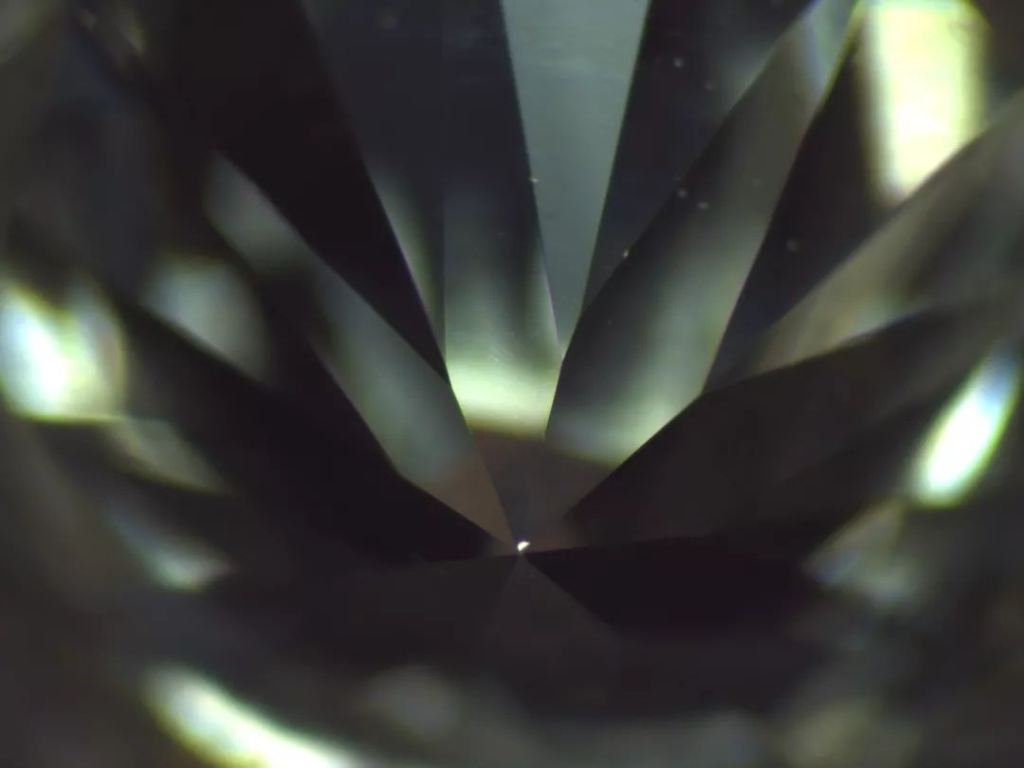
- (2) Observe the cutting quality of gemstones
Observe the quality of the cut and polish of the gemstone. For example, the evaluation of diamond cut: whether the symmetry is good, whether the same-shaped facets are of equal size, whether the ridges intersect at one point, whether there are extra facets, whether there are polishing lines and burn marks on the surface, etc. (Figure 17).
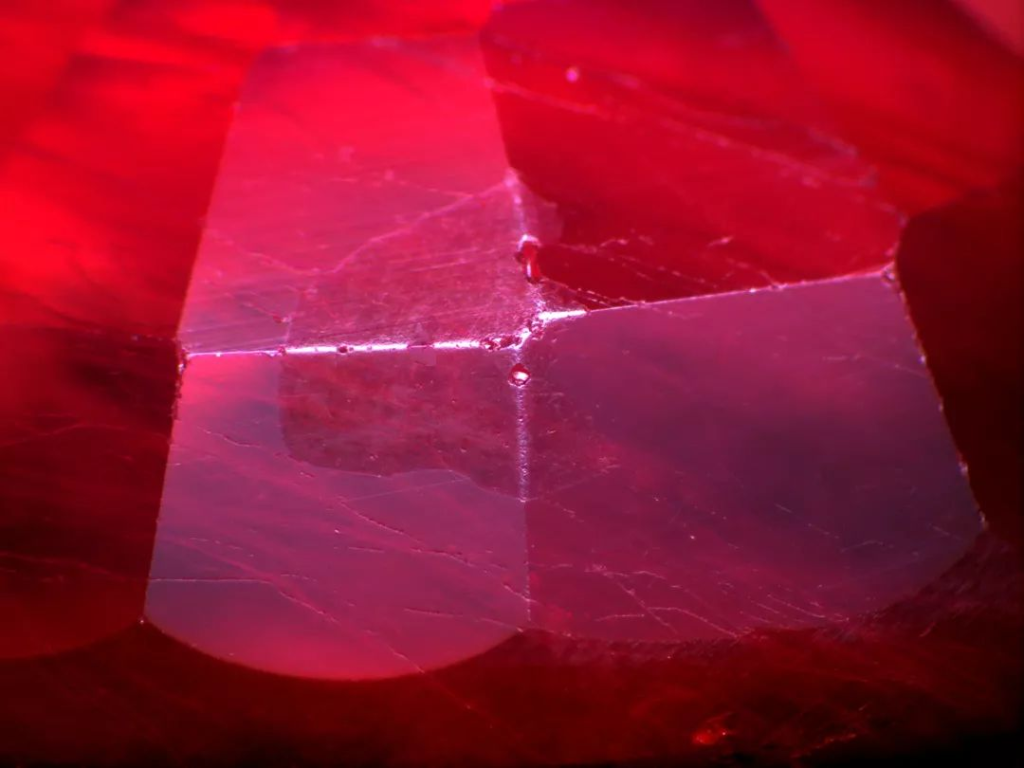
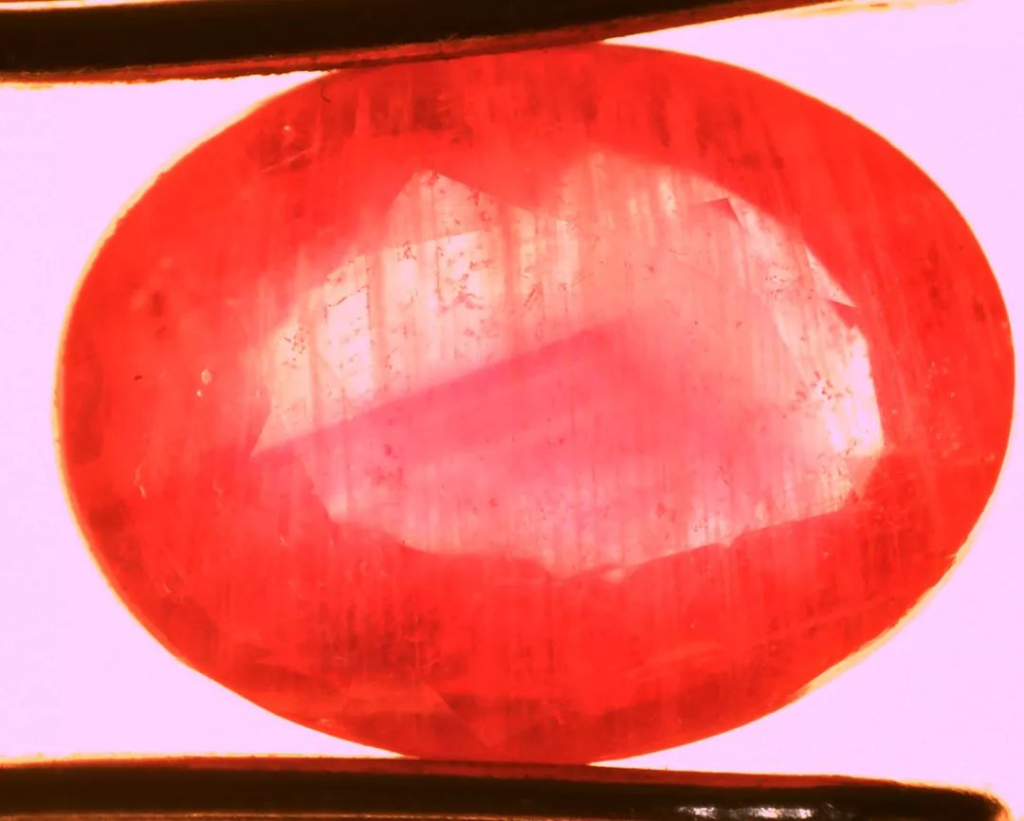
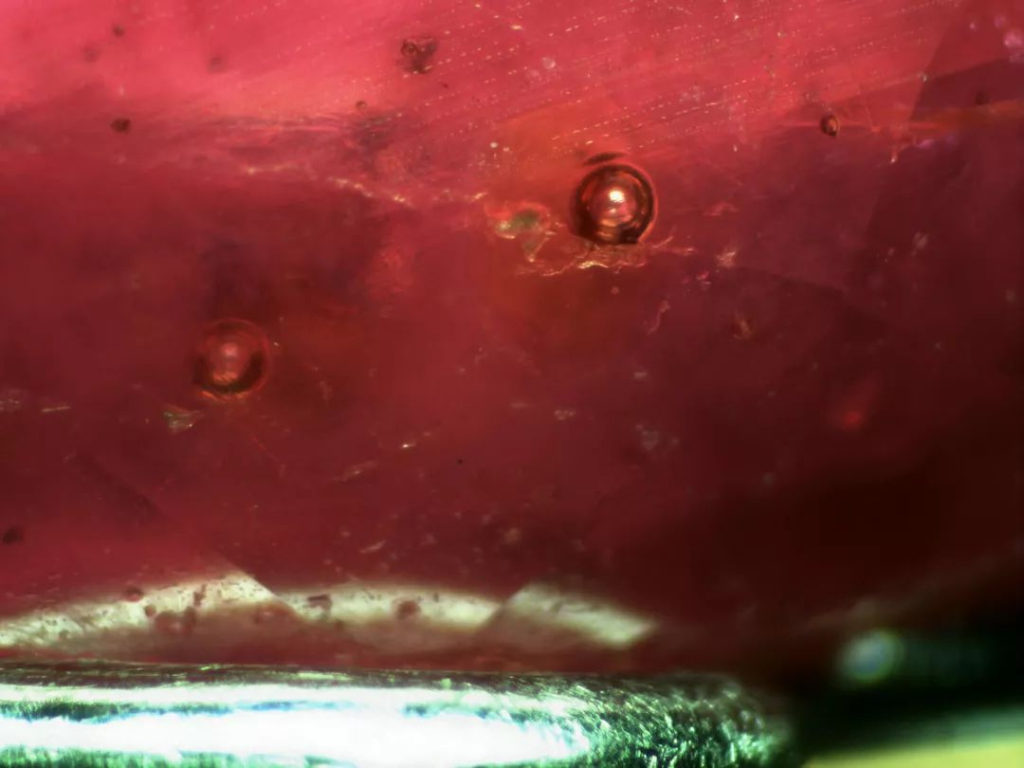
B. Look inside the gemstone
Internal features include color bands, growth lines, ghosting of back facets, inclusions, etc. By observing the internal characteristics of gemstones, we can identify gemstones, distinguish natural from synthetic, whether they have been optimized, etc. (Figure 18, Figure 19, Figure 20).

C. Determination of approximate refractive index:
If the gem is a crystal fragment and there is no smooth surface for refractometer testing, an immersion liquid can be used under a microscope to measure the approximate refractive index of the gem. The main methods include Becker’s line method and Plato’s method. method and direct measurement method.
D. Observation of absorption spectrum:
Replace the eyepiece with a splitter, and select the bottom light source to transmit illumination to detect the spectral characteristics of the gemstone.
E. Interference pattern:
Use two polarizers to make them orthogonal, and use a condenser under the object to provide convergent light. The interference pattern of the gem can be checked. The gem to be tested must be immersed in an immersion liquid with a similar refractive index, and a gem holder is used. Clamp the stone until an interference pattern appears.
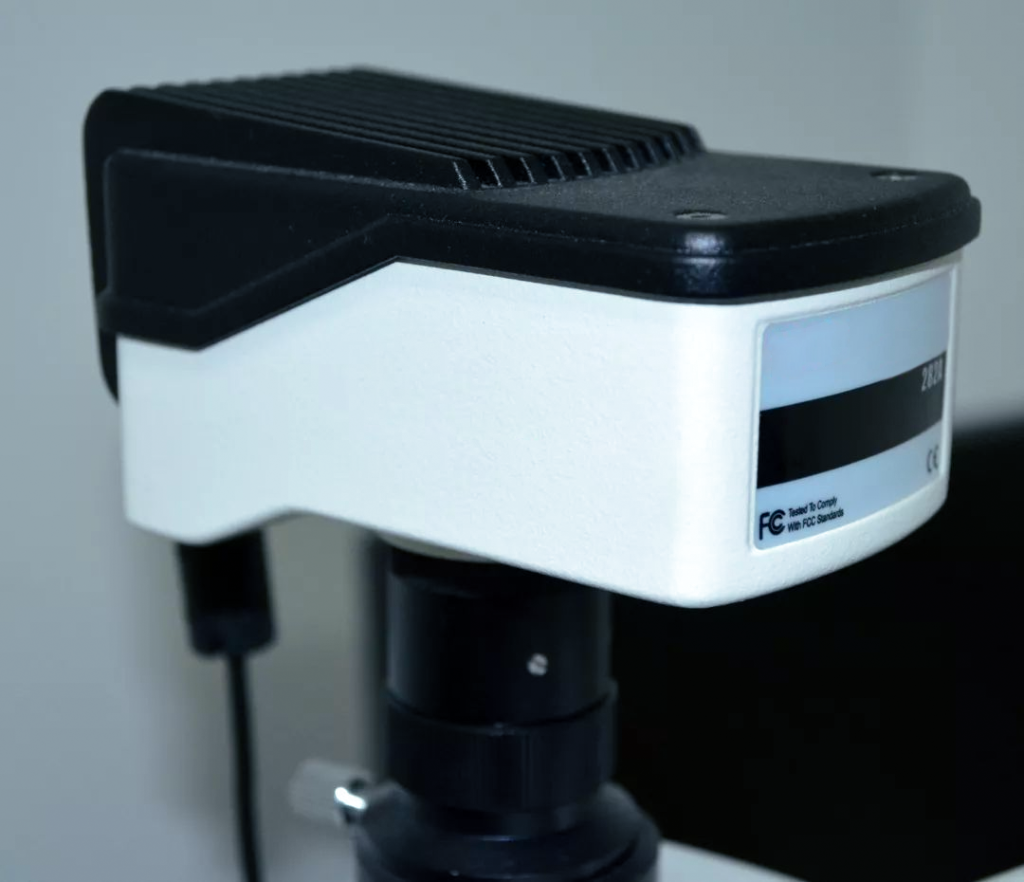
F. Microphotography:
The connection between the CCD camera and the third tube of the microscope can directly take pictures of the phenomena observed in the gemstone to provide a permanent photographic record (Figure 21).